Elements, forms, slots and enemy archetypes, with the constraints each one carries.
Prototype. The question this build is for is its playtest gate:
"do 1–3 playtesters start another run unprompted and build it differently?"
That gate has not been passed. I put this build on the site ahead of
it, by choice, so it is now a test of the game.
My own read after playing it: "The bones I think are now mostly
in place for a play-session. Leveling up feels good, collecting
things feel good, upgrading your abilities feel good."
Enemy health is still sized for the August build, where reactions
did the killing. How the monk's damage holds up against it at this
run's density is not yet played. Values are first-pass and not
quoted here.
The monk
One character, four moves. The resource is Focus:
two pips. Alternating Punch and Kick fills them, one pip for each
attack that lands. Pressing the same attack twice in a row resets them
to zero. At full Focus the next move comes out empowered and spends
both pips. Dodge and Heal spend Focus but never fill it.
Punch (L-Click) is a short jab. Empowered, it is Chi Blast: a leap, then a bolt that pierces every body in its path.
Kick (R-Click) is a cone in front of you. Empowered, it is Spinning Kick: one circle all the way around you, bigger than the cone.
Dodge (Space) is a short hop. Pure movement, no charges. At full Focus it is the Flying Kick: a longer, committed flight that damages what it passes through, then shoves and stuns what is around it when it lands. A second press lands it early.
Heal (R) restores health, more for each Focus pip it spends. At full Focus it is Heal + Shield, which also raises a shield for a short window. The shield bounces a ranged shot back at its source and freezes a melee attacker in place.
Chi Blast is a line and Spinning Kick is a circle. Only those two
presses make forms, so that difference decides the shape of every
form in the game: on Chi Blast they run along your aim, on Spinning
Kick they surround you.
Slots
Kills drop gems, and gems buy level-ups. Each level-up is a choice:
pick an element, then a slot for it on Punch or
Kick. Each has three slots, and each slot levels up
to level 8. Dodge and Heal hold none. Every element on an attack adds
its verb to that attack's hits, empowered or not.
The left slot is the primary. Only the primary makes a form, and only on the empowered press. It makes its first form at level 3 and one more at every level after that.
The other two slots are secondaries. A secondary never makes a form of its own. From level 3 it throws small extras off the primary's form instead: a small fireball, one strike, a shoving ripple or a pulling whirl. Extras grow more slowly than forms on purpose, because a secondary's extras come off every form the primary makes.
Elements can repeat. When a secondary holds the same element as the primary, the primary's forms merge into one bigger form, and that secondary's extras become small copies of it.
Placing is two clicks: an element, then a slot. Clicking the PRIMARY cell with a different element promotes that element to primary. Levelling a secondary never promotes it on its own.
Consequence worth knowing: a primary below level 3 makes no form.
Until it gets there, Chi Blast or Spinning Kick carries the
secondaries' extras itself, once, from where the bolt stops or
around the spin.
Elements
Four elements, each a verb that steps up at levels 2, 4, 6 and 8,
and each with one form as a primary and one extra as a secondary.
Burns
Fire
Effect
Sets what it hits burning.
Steps
Each step adds a burn stack per hit and raises the cap on how many stacks that attack can build.
As primary
Fireball. A bolt that flies until it hits something or runs out of range, then splashes, burning and shoving what is near. Chi Blast fans them along your aim. Spinning Kick spreads them evenly around you.
As secondary
From level 3, small fireballs thrown off the primary's form.
Bounds
A fireball can end only once, so its splash and what it throws off cannot fire twice. The splash burns and shoves but never arcs, so a Lightning secondary is not counted twice.
Shoves
Water
Effect
Shoves what it hits.
Steps
Each step shoves one tier further.
As primary
Wave. A zone that carries what it meets. Chi Blast sends waves rolling forward along your aim, a beat apart. Spinning Kick sends rings rolling outward.
As secondary
From level 3, a ripple ring that shoves. Unless it merges with a Water primary, higher levels give the ripple more reach rather than adding more ripples.
Bounds
One ripple per throw, so rings from one spot never stack. Like every extra, a ripple spawns nothing further.
Arcs
Lightning
Effect
A hit arcs from its target to another enemy nearby. The first jump always happens. The ones after it are a chance.
Steps
Each step adds another guaranteed jump before the chances start.
As primary
Thunderstrike. Points marked when you press, landing one after another, nearest first. Chi Blast lines them up along your aim. Spinning Kick rings them around you.
As secondary
From level 3, strikes thrown off the primary's form.
Bounds
The guaranteed jumps are fixed when the arc starts and the chances always run out, so one arc has a ceiling however big the crowd. Each Thunderstrike point lands exactly once.
Gusts
Air
Effect
The attack's hits send gusts of wind. A wider shape sends more of them.
Steps
Each step adds another gust.
As primary
Tornado. A zone that damages on entry, then pulls in and hurts what stays inside. Chi Blast sends them along your aim, weaving as they travel. Spinning Kick sets them orbiting the spot you pressed from.
As secondary
From level 3, small whirls that pull, thrown off the primary's form.
Bounds
The pull is movement only, never a hit. It can gather a crowd without setting anything else off. A tornado throws its extras on a fixed clock over a fixed life, both set when it spawns.
Enemies
Six enemy types, each written to ask one question that none of the
others ask. Every attack is telegraphed, and bodies do no contact
damage. The one thing that hurts on touch is a spearman's levelled
spear. The old answers to those questions were reactions. Which of
the monk's tools answers each one now is still open. The sprites are
the game's placeholder art, from 0x72's DungeonTileset II (CC0).
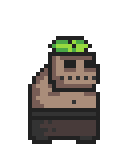
Zombie
Role
Fodder. The slow biter, next to the Swarm's fast one.
Behaviour
Walks straight in, winds up briefly, and swings one short, wide bite ahead of its body. Too solid to walk through: a horde is a wall you dodge through.
Counterplay
The dodge. The tell is short, so a Zombie lands on a player who reacts late.
Asks
Are you reading the tells, even on fodder?
Swarm
Role
Fodder that comes from the side.
Behaviour
Packs of fast, small biters that flank.
Counterplay
They have no mass against you, so they can never pin you in place.
Asks
How do you handle what you aren't facing?
Archer
Role
Ranged. Forces an approach.
Behaviour
Fires a telegraphed shot from range. When you get close it breaks away in one quick dodge and fires the instant the dodge ends, from wherever it landed. A dodge is a commitment to fire. Near a shield wall it takes cover behind the back rank.
Counterplay
Close in during its telegraph: it can only dodge while approaching, so that beats the dodge. Heal + Shield bounces its shot back at it.
Asks
Can you close distance honestly?
Orc
Role
Big bodies in packs.
Behaviour
Closes at speed and swings a telegraphed cone in front of itself. Big enough to hold you out of its space unless you are mid Flying Kick.
Counterplay
Its recovery after every swing is a free window. The Flying Kick clears every body.
Asks
Can you wait out the swing and punish the recovery, with a pack of them on you?
Spearman / shield wall
Role
Formation pressure.
Behaviour
Alone, an ordinary body with its spear raised. Its levelled spear hurts on touch. Spearmen that link up form a shield wall: big, stagger-immune, with a shield line across the front that refuses hits and bolts. The wall pivots to face you, then walks, thrusting one member at a time.
Counterplay
The shield is one-sided. Hits from the side or behind land. A landed hit, a death, or a shove or pull that splits the group breaks the whole wall, and the survivors regroup.
Asks
Can you get around it, and clear it before it re-forms?
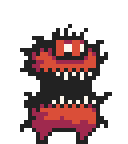
Boss
Role
The end of the run. It arrives at the centre at the 10-minute mark. Killing it wins, and every enemy still alive dies with it.
Behaviour
Stands at the centre and never moves. Stagger-immune, and nothing shoves it. Alternates strictly between a volley of shots, each re-aimed at you, and a crater slam. Stomps if you get close.
Counterplay
Strict alternation is the tell: after the volley, the slam is next. Heal + Shield bounces a volley shot back at it.
Asks
Can you read what is coming and answer it, with the rest of the field still alive?
A formation instead of a Wall
The August roster had a Wall: a large, slow, armored body that
pushed you out of its space. I retired it for the Spearman.
No single enemy is the wall now. Spearmen that end up standing
together link into one, even ones that did not spawn together, and
it breaks and re-forms in play. In my words from the design:
"spearmen together are a pretty major threat, breaking them up
turns that threat way down, but if you don't clear them out they
can re-form and become a threat."
 Zombie
 Swarm
Swarm Archer
 Orc
Orc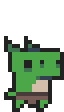 Spearman / shield wall
 Boss
Boss